
Guideline: Virtual Presentations
4th International Symposium (Virtual) of Earth, Energy, Environmental Science, and Sustainable Development 2023
1. Record the presentation as a video consisting of presenter’s material and voice.
2. Use a quiet space, isolated from noises from pets, family members, and others, if possible
3. Please close unused applications and programs on your computers such as YouTube, Whatsapp Web, Music, and other distractions during the session, be mindful of anything visually distracting in the background.
4. Capture a single screen with the presentation/slides in full screen. Advance the slides as if you are presenting live.
5. Presenters are not obligated to show their faces (such as via webcam).
6. When recording, we recommend using an external microphone, such as on a headset. Using the built-in microphone of your webcam/laptop is also acceptable, only if presenters ensure minimal ambient noise.
7. With your presentation open, on the Slide Show tab, click Record Slide Show. You can choose whether to start on the current slide or from the beginning. Be careful of the Clear command as it deletes narrations or timings.

8. In the Record Slide Show box, check or clear the boxes for your recording preferences, then click Start Recording.

9. At the beginning and the end of the video, record a 10-second silent time (before the introduction and after the presentation). This will make it easier for us to edit and incorporate your recordings into the platform.
10. Introduce yourself for a maximum of 2 minute and present your paper during the next 7 minutes. In total, your recording (including silent time) should not exceed 9 minutes.
11. At the top left corner of the window is the Recording toolbar, which you can use to:
- Go to the next slide:
- Pause the recording:
- Start over/re-record the current slide:

12. You can use your common Microsoft PowerPoint pointers (e.g. ink, eraser, or the laser pointer) as usual.
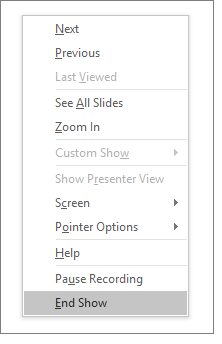
13. To end your recording, right-click the final slide and click End Show.
14.To save your recording as a video, toggle the menu and click Export. Choose the option Create a Video, opting for Full HD (1080p).

15. Do not forget to click the Use Recorded Timings and Narrations

16. Lastly, click the Create Video

17. Save your video in MPEG-4 Video (*.mp4) format and name the file using the format “Parallel sessions – your topic – Submission paper ID number – paper title”.

18. More detailed technical information regarding recording your PowerPoint presentation may be accessed at Support Office.
19. Before submitting, we recommend sending your video to your friends or colleagues for review and ask them to confirm that the slides are legible and that the audio is clear. For example of video presentation, please download within this link: Download. Introduce yourself for a maximum of 1 minute and present your paper during the next 7 minutes. In total, your presentation (including silent time) should not exceed 9 minutes.
Enabling local recording
1. Sign in to the Zoom web portal and click My Meeting Settings (if you are an account administrator) or Meeting Settings (if you are an account member).
2. In the Recording tab, navigate to the Local Recording option and verify that the setting is enabled. If the setting is disabled, click the toggle to enable it. If a verification dialog displays, choose Turn On to verify the change.
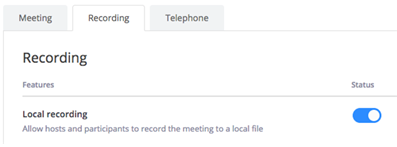 Note: If the option is grayed out, it has been locked at either the group or account level, and you will need to contact your Zoom administrator.
Starting a local recording
1. Record the presentation as a video consisting of presenter’s material and voice.
2. Use a quiet space, isolated from noises from pets, family members, and others, if possible
3. Please close unused applications and programs on your computers such as YouTube, Whatsapp Web, Music, and other distractions during the session, be mindful of anything visually distracting in the background.
4. Open your presentation file as well as Zoom.
5. Start a Zoom meeting by yourself as the host.
6. Make sure you unmute your speaker. When recording, we recommend using an external microphone, such as on a headset. Using the built-in microphone of your webcam/laptop is also acceptable, only if presenters ensure minimal ambient noise. Don’t forget to talk slower and louder than usual.
7. Presenters are not obligated to show their faces (such as via webcam). You can turn on your camera by clicking “Start Video” or turn your off your camera by clicking “Stop Video”.
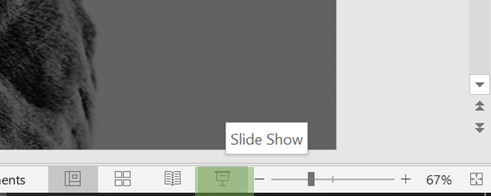
8. Click on the “Slide Show” button to enter full-screen.
9. Click Alt+Tab (Windows) or Command+Tab (Mac) then move your mouse to your Zoom Windows.
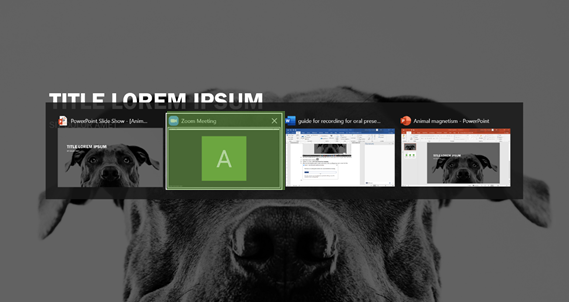
10. Click “Share Screen” on your Zoom Application.
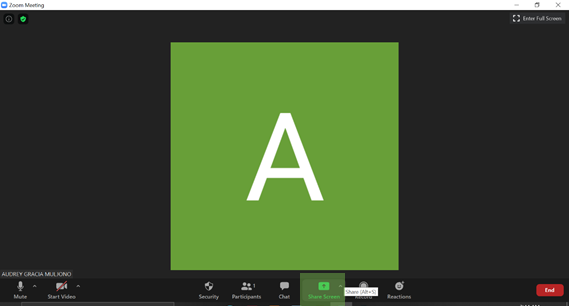
11. Select the “PowerPoint Show-your presentation file name,” which is your fullscreen presentation. Make sure you click “Share computer sound,” and then click share. Do not click “Optimize Screen Sharing for Video Clip.”

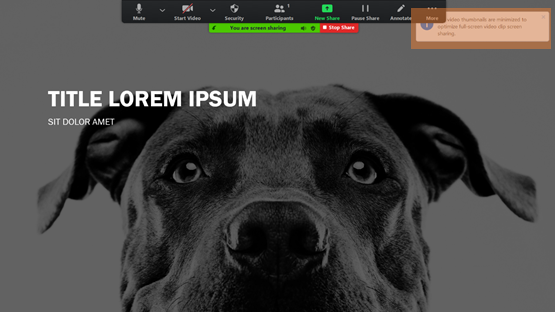
12. Don’t forget to close that little message box on the upper-right corner of your screen.
13. Click “More” then the option to “Record.”
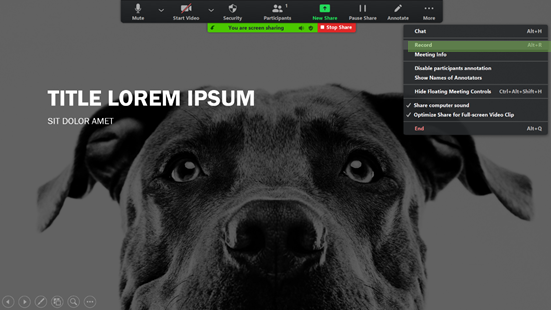
14. If there is a menu, select “Record on this Computer.” If you did not find “Record on this Computer,” you can skip this step.
15. At the beginning and the end of the video, record a 10-second silent time (before the introduction and after the presentation). This will make it easier for us to edit and incorporate your recordings into the platform.
16. Introduce yourself for a maximum of 1 minute and present your paper during the next 7 minutes. In total, your presentation (including silent time) should not exceed 9 minutes.
17. Use your arrows on your keyboard or your mouse to change your slide.
18. You can use your mouse as your pointer, but be mindful that your mouse might block your slides.
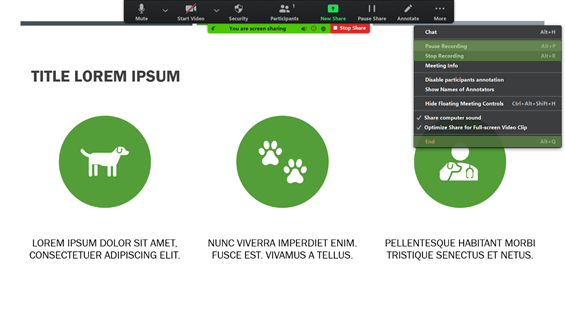
19. You can Pause or Stop your recording in the “More” option then click the button. You can also end your recording by ending your meeting.
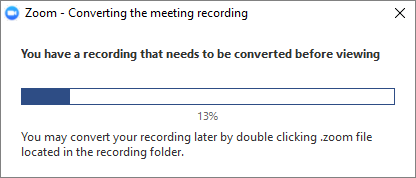
 20. After the meeting has ended, Zoom will convert the recording so you can access the files.
21. Once the conversion process is complete, the folder containing the recording files will open. Note: By default, the audio/video file (MP4) will be named Zoom_0.mp4. The audio only file (M4A) is named audio_only.m4a
22. Rename the file using the format “Parallel sessions – your topic – Submission paper ID number – paper title”
23. More detailed technical information regarding local recording may be accessed at https://support.zoom.us/hc/en-us/articles/201362473-Local-recording
24. Before submitting, we recommend sending your video to your friends or colleagues for review and ask them to confirm that the slides are legible and that the audio is clear.
